Keep searches simple. Use keywords, e.g. "leaking", "pump", "broken" or "fit".
Sorry, we couldn't find any existing reviews that matched. Try using some different or simpler keywords.
★★★★★
★★★★★
Craig M - 20 days ago
Verified Purchase
Easy repair
Just followed the video on the website and changed it no problem and in no time at all
★★★★★
★★★★★
Terrence S - May 25, 2024
Verified Purchase
Bore finish was a bit rough.
Bore finish was rough. It measure up as acceptable. New grease and this part should extend the mixers life for a few more years.
★★★★★
★★★★★
Tony H - January 11, 2024
Verified Purchase
Awesome part and install guide
It was bang on correct. Follow the video guide to replaced the cog in about 30 minutes. Took longer to clean up the grease than fit the part. Awesome service too the part was here in like 2 days, which over the Christmas break was great and very sorely needed
★★★★★
★★★★★
Luc G - August 22, 2023
Verified Purchase
Exactement la pièce qu'il fallait.
Livraison rapide et en excellent état.
★★★★★
★★★★★
Hesham K - April 14, 2023
Verified Purchase
Great part! Exactly what I needed
Part came really fast and was an original factory part. Great quality too. Don't try to replace this with a
cheaper metal one; it's plastic for your safety.
★★★★★
★★★★★
Hank V - April 12, 2023
Verified Purchase
Mixmaster repair
Easy part to replace. Just be careful how you take it apart.Work around all the grease.
★★★★★
★★★★★
Brenda H - March 15, 2023
Verified Purchase
Quick and easy repair
My kitchen aid mixer quit and this part was worn. The video showed how to replace it and the part came in a couple days. It is purring like a kitten again ????
★★★★★
★★★★★
Blagovest L - February 26, 2023
Verified Purchase
As advertised
Fast expedition, the right part, work as expected. Thank's!
★★★★★
★★★★★
Bonnie B - December 28, 2022
Verified Purchase
Thrilled to be working again
The part was an easy fix with the help of YouTube. Mixer was back up and working within the hour of receiving the part. Fast delivery and helpful staff.
★★★★★
★★★★★
Douglas S - December 19, 2022
Verified Purchase
right part fits great
the part was exactly right, easy enough to fix with a little help from you tube.
< Prev
1
2
3
Next >
Customer Repair Stories
Average Repair Rating: 3.0 / 5.0, 28 reviews.
What's this?
< Prev
1
2
3
Next >
Sort by:
Search filter:
Clear Filter
Your search term must have 3 or more characters.
Keep searches simple. Use keywords, e.g. "leaking", "pump", "broken" or "fit".
Sorry, we couldn't find any existing installation instruction that matched.
motor would run but mixer wouldn't operate: broken worm gear
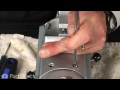
My girlfriends' stand mixer failed when the accessory drive cap fell into the mixing bowl and jambed the beater, spliting the worm gear. The teeth on this gear are made of nylon and are molded to an aluminum center. This part is designed to fail in situations like this, saving the more expensive transmission parts. Following a repair manual I found online, I first removed the rear cover and pulled out the cord strain relief out from the base. Next I removed the drip cup from around the base of the planetary drive. I then used a pin punch to drive out the pin holding the planetary to the center shaft and removed the planetary. The unit was then inverted and I removed 4 screws holding the bottom cover to the gear case, and the 5 screws from around the planetary drive. The bottom cover was then lifted off. Three screws holding the worm gear bracket in place were then removed and the worm gear assembly lifted out. A small pin holds the worm gear to the shaft. I drove this out with a small pin punch and the shaft and worm gear were then removed. There is also a thrust washer on this shaft, and it's location is important. Make a note for re-assembly. The new gear was installed and the entire process reversed for re-assembly. A successful repair completed! My girlfriend would have replaced this $200 appliance, but I was able to repair it for less than $30 including shipping.
Other Parts Used:
Raymond from Shirley, MA
Difficulty Level:
Easy
Total Repair Time:
30 - 60 mins
Tools:
Screw drivers
81 of 84 peoplefound this instruction helpful.
Was this instruction helpful to you?
Thank you for voting!
The worm gear (plastic-made to be the weakest spot), three teeth were worn,
I removed the lower unit along with the top unit, removed the gear, replaced the gear, then put back together. I removed the grease, saved most of it, then discarded what looked like the dirty grease. I cleaned inside thoroughly in case broken parts were inside. The three schematics were very helpful in re-installed. Mixer was 40 years old but works like new!
just took the unit apart and replaced the worn gear and bracket . Then took the old worn gear and bracket apart and replaced the worn gear . Then put the assy back together and now I have a spare
first removed the dress ring by tapping it very gently.then drive the pin out that holds the beater plate on, now wiggle it off, then you can see the screws that hold the gear reducer on. remove them. take that off and you will see the housing that hold the worm gear. remove the 3 screws that hold it down . Now you will have to drive the drift pin out that holds the worm gear in place, slide the shaft out then remove gear. reverse order to assemble
Other Parts Used:
Curtis from Green River, WY
Difficulty Level:
Really Easy
Total Repair Time:
15 - 30 mins
Tools:
Screw drivers
8 of 9 peoplefound this instruction helpful.
Was this instruction helpful to you?
Thank you for voting!
Stripped gear when I tried to make Pizza Dough
Very messy as there is lots of heavy grease inside the mixer and you have to fish out the blown gear parts. I vary glad I took shop class in High school as it preped me for the job. The machanical drawing you provide were very useful but you should mention the grease.
Mixer works just like new. and I got the parts in two days with standard shipping. Pizza on Thursday and fixed by Saturday
Other Parts Used:
Patrick from Cupertino, CA
Difficulty Level:
Easy
Total Repair Time:
30 - 60 mins
Tools:
Screw drivers
7 of 8 peoplefound this instruction helpful.
Was this instruction helpful to you?
Thank you for voting!
Worm gear was missing teeth
Took the mixer apart and cleaned the grease so off I could see the pins. Wasn't a hard fix only thing is make sure to clean the grease off so you can see what your doing
Other Parts Used:
Terry from Pigeon, MI
Difficulty Level:
Really Easy
Total Repair Time:
15 - 30 mins
Tools:
Pliers, Screw drivers
6 of 7 peoplefound this instruction helpful.
Was this instruction helpful to you?
Thank you for voting!
Worm gear broken
I called my fiancée.
Other Parts Used:
Jennife from Lancaster, PA
Difficulty Level:
A Bit Difficult
Total Repair Time:
30 - 60 mins
Tools:
Screw drivers, Wrench (Adjustable)
6 of 10 peoplefound this instruction helpful.
Was this instruction helpful to you?
Thank you for voting!
mixer would not turn
removed the screws holding the mixer housing and then removed the worn worm gear by removing the roll pin holding it on the shaft. Replaced the worm gear and inserted the pin that hole it in place. Replaced some of the gear grease and reassembled mixer. Went very easily. No problems at all.
planetary gear would not turn; discovered worm gear was broken upon dis-assembly of mixer
Followed step-by-step video instructions for dis-assembly/reassembly found at ereplacementparts.com. All went well except when driving out the pin that holds the worm gear in the tower. The video wasn't exactly clear enough about what position the pin should be in when driving it out and I inadvertently drove the pin out so that it was trapped inside the tower assembly. Result? I had to bend the pin to get it out, causing an extra expenditure and wait time to order a new pin. So, lesson learned: be sure the pin is horizontal to the tower and not perpendicular to when driving the pin out. Also, I found that having the mixer apart was a good time to replace the grease in the housing. I don't think it would be required to replace the grease at this time but I was worried that pieces of the old worm gear could remain in the grease and possible get jammed in the gears after repairs were completed. Be sure to get a "food grade" grease not grease from your local auto parts store! The table knife was the best tool to use to remove the grease and to smear the grease all over the internal gears when replacing it.
Looked for the probable cause from a U-tube video, then found the parts list and repair video on the PartSelect website. When the parts arrived within 3days the shipped email had a video on exactly how to complete the repair. Repair video was very well done and easy to follow.
Ask our experts a question about this part and we'll get back to you as soon as possible!
5 questions answered by our experts.
< Prev
1
Next >
Sort by:
Search filter:
Clear Filter
Your search term must have 3 or more characters.
Keep searches simple. Use keywords, e.g. "leaking", "pump", "broken" or "fit".
Sorry, we couldn't find any existing answers that matched.Try using some different or simpler keywords, or submit your new question by using the "Ask a Question" button above!
Bill Johnson
February 20, 2018
How do i get the plastic worm gear out of the housing its assembled in on my KitchenAid mixer?
For model number K45SSWH
Hi Bill,
Thank you for your question. There is a video listed with the worm gear on our website that you may reference for information. I hope this helps. Thank you and have a great day!
7 people found this helpful.
Was this helpful?
Thank you for voting!
Robert
September 2, 2019
I am replacing the worm gear in my kitchen aid mixer. The grease is full of shredded nylon so I think I need to replace the grease. Is there any particular weight or composition grease I should use. Any grease that I should avoid using?
For model number K5SSDWH
Hello Robert, Thank you for the question. You will need to use the mixer grease, PartSelect Number PS12583821. Hope this helps!
I need to replace worm gear. Do you ship to israel? If not i can have it shipped to a relative in us and have them ship to me; i'd rather you ship if you can.Yours
jim baker
For model number 5K5SS
Hello James, thank you for your question. The worm gear is PartSelect Number PS11740516 for this unit. Unfortunately, we are only able to ship within the US. I hope this helps.
1 person found this helpful.
Was this helpful?
Thank you for voting!
Al.Greco
April 3, 2019
My mixer runs ok but under a load.It starts to vibrate &jump.Up&down is this a worm gear problem?
For model number KSM90Ww
Hello Al, thank you for your question. Yes, it is most likely an issue with one or more of the gears. We would recommend removing the planetary and inspecting the gears for wear and tear. I hope this helps!
1 person found this helpful.
Was this helpful?
Thank you for voting!
Sandy
July 10, 2019
Our worm gear has on it 241803. Is this the same as wpw10112253
Hello Sandy, thank you for contacting us, In order for us to locate the correct parts and repair information we will require the model number of the unit. Once you have located the model number please feel free to resubmit the question and we will be happy to help you. Look forward to hearing from you!
Was this helpful?
Thank you for voting!
< Prev
1
Next >
✖
Ask a Question
Ask our experts a question on this part and we'll respond as soon as we can.
Fresh Flow Produce Preserver is made for your refrigerator to help keep produce fresh for longer by absorbing the chemical, ethylene, that causes your fruits and vegetables to ripen quicker. Your produce could be fresh f...
This solid element restorer is for ranges and cooktops. Solid element restorer restores and protects solid elements from rusting and spotting. Follow the instructions on the label when using this product.
This front load washer cleaner removes odor-causing residue. Use it once a month and it will keep your machine fresh and clean. Package comes with 3 tablets.
This low-odor gel, easily cleans away tough burnt-on deposits at room temperature. Apply the gel evenly on the cooled oven surface. Leave the gel to set overnight then wipe away with a clean cloth.
Make your cooktop shine with Frigidaire ReadyClean Glass and Ceramic Cleaner. Our scratch-free, streak-free formula removes smudges, grease, burnt-on food, dirt and oil, while protecting and polishing to repel dust and d...
Model Cross Reference
This part works with the following models:
PartSelect Number: PS11748374
Manufacturer Part Number: WPW10112253