


Product Description
Drive Coupling Specifications
This drive coupling has reverse threads. You must turn it clockwise to unscrew from the motor shaft. This part is used on blenders.

How Buying OEM Parts Can Save You Time and Money
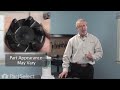
Part Videos
Replacing your KitchenAid Blender Drive Coupling

Troubleshooting
This part fixes the following symptoms:
Touchpad does not respond | Door won’t open or close
This part works with the following products:
Blender.
This part works with the following products:
KitchenAid.
Part# WP9704230 replaces these:
AP6013694, 9704230, WP9704230VP
Customer Reviews
Filter By Rating:
- < Prev
- 1
- 2
- 3
- Next >
Sort by:
Search filter:
Clear Filter
Your search term must have 3 or more characters.
Keep searches simple. Use keywords, e.g. "leaking", "pump", "broken" or "fit".
Sorry, we couldn't find any existing reviews that matched. Try using some different or simpler keywords.
Shellyann C - December 2, 2023
Verified Purchase
Great replacement part. Works great
The drive coupling was great quality and we received within a week. We have bought from parts select before and their website is fantastic to be able to find the parts you need for appliances.
Rob S - August 13, 2023
Verified Purchase
Easy repair
Great instructions
Kim D - July 8, 2023
Verified Purchase
Blender Drive Coupling repacement
The part came lightning fast. (Next day). Exactly what I wanted! Great service.
Denis B - March 2, 2023
Verified Purchase
Easiest small appliance repair
Received the part as stated. Perfect replacement for the original. 5 minutes and I had a brand new blender. Sweet. Couldn't be happier with the service from PartSelect.
Gloria G - January 15, 2023
Verified Purchase
Parts
It was the right drive coupling part.thank you.
Carolle C - August 29, 2022
Verified Purchase
Instalation not clear to my understanding
My glass jar does not sit properly. The only one time I used it the liquid was running on the counter. Maybe there is something I did not do right while installing it. The delivery was fast enough and the part was the proper one. I should use it some more to make sure the part takes it's good place. I am french so my writing might seem akward.
Jennifer S - August 28, 2022
Verified Purchase
Super easy repair
Top part quality. Came with a easy install video, that made the job super easy.
Leslie M - July 23, 2022
Verified Purchase
Was a okay came very fast part was in conditions, My appliannce is back in workings order.
Thanks very much for the fast daliveri.
Stephen B - June 1, 2022
Verified Purchase
Fast part delivery -
Instructions that came with the part were so easy to follow. I replaced the broken part in a few minutes, and it worked like a charm. Thank you
Heather P - February 10, 2022
Verified Purchase
Easy fix
I ordered a part for my blender. It was delivered very quickly and it was very easy to fix. The part was received in perfect condition!
- < Prev
- 1
- 2
- 3
- Next >
Customer Repair Stories
Average Repair Rating: 4.5 / 5.0, 276 reviews.
What's this?
- < Prev
- 1
- 2
- 3
- Next >
Sort by:
Search filter:
Clear Filter
Your search term must have 3 or more characters.
Keep searches simple. Use keywords, e.g. "leaking", "pump", "broken" or "fit".
Sorry, we couldn't find any existing installation instruction that matched.
Coupling teeth gone.
First I inserted a small diameter rod in the motor fins to keep the motor from turning. Then I simply loosened the coupling. (Please know this is a left-hand thread). The coupling was not that tight. New coupling only requires a snug hand -tightening. You are are good to go!
Other Parts Used:
-
STEPHEN from PITTSBORO, IN
-
Difficulty Level:Really Easy
-
Total Repair Time:Less than 15 mins
694 of 738 people
found this instruction helpful.
Was this instruction helpful to you?
Thank you for voting!
1/2 of the teeth broke off of the blender drive coupling
My first step in repairing the broken KitchenAid blender, was to politely inform my wife HOW & WHY the blender broke in the first place. She thanked me for that, so she would know for the future. (whew...)
Replacing the drive tooth wheel was a cinch. We who are reading this are all fortunate to have others, before us, fill us in on the details. I'm glad I read previous testimonials instead of banking on KitchenAid's instructions. Although the motor shaft is a left-hand threaded mount, the mfg's instructions said to remove the defective coupler by prying the wheel off in various positions with a 1/2" screwdriver!! Reading previous repair stories here, proved to be more reliable.
It took more time for me to find a tool to aid in the removal of the old part, than it was to replace the part itself. I needed to find something that was thin enough to fit around the motor shaft and hold it from turning while I unscrewed the defective coupler in a "clockwise" direction. I eventually found a small, old pair of adjustable wire strippers. I was able to wiggle them in and barely grab the motor shaft. I turned the coupling clockwise and it came right off. No problem at all. Turns out that all that was probably needed was to insert a small punch between the motor fan blades through the bottom of the unit just to keep the motor from turning. The new fitting doesn't have to be on any more than hand tight, as the blender runs in a clockwise rotation, and will keep the fitting snug all the time.
Good luck, home mechanics.
Other Parts Used:
-
Richard from Naperville, IL
-
Difficulty Level:Really Easy
-
Total Repair Time:15 - 30 mins
339 of 377 people
found this instruction helpful.
Was this instruction helpful to you?
Thank you for voting!
Broken Coupling on Blender
I slid a cheap, stamped-steel 7.5 mm bicycle wrench under the coupling - into the grooves on the shaft - and held the shaff so that the coupling could simply be unscrewed. (backwards thread) Took less than 60 seconds to make the entire repair. No prying, no problems.
Other Parts Used:
-
Tony from Denver, CO
-
Difficulty Level:Really Easy
-
Total Repair Time:Less than 15 mins
76 of 78 people
found this instruction helpful.
Was this instruction helpful to you?
Thank you for voting!
drive coupling on blender shattered
The drive coupling on my Kitchen Aid Blender shattered into dozens of pieces. Found this website and realized I could buy a new one. Could not remove coupling base with "official" instructions. However, user comments on how they removed coupling base very helpfull. Put thin blade screw driver thru hole on bottom of blender base, held the blade from turning and twisted the coupling base off. Very easy and quick. New one when on just as easily.
Other Parts Used:

-
Lynda from Boise, ID
-
Difficulty Level:Really Easy
-
Total Repair Time:Less than 15 mins
-
Tools:Screw drivers
69 of 81 people
found this instruction helpful.
Was this instruction helpful to you?
Thank you for voting!
All the dogs had broken off the coupler.
Inserted a very thin (approx. 3/32") open-end wrench into the gap between the old coupler and the base of the blender to engage two flats on the drive shaft and hold the shaft from rotating. Grasped old coupler with adjustable pliers and turned clockwise to loosen and unscrew. Threaded the replacement part back onto the drive shaft and patted myself on the back for a job well done.
Other people's repair stories were extremely valuable -- alerting me to the fact that the coupler has a left-hand thread and that the shaft has flats ground on it to engage a very thin open-end wrench. The only advice I can add to others' stories is that you can use a bench grinder to slim down a wrench which is too thick to fit into the gap between the coupler and the base housing. I already owned a set of so-called "ignition" wrenches, and all the sizes up to "1/4" were thin enough to fit into the gap. But the 9/32" wrench (which was what I needed) was just a a little bit too fat. Grinding down the head to fit into the gap was the most-time consuming part of the repair.
Other people's repair stories were extremely valuable -- alerting me to the fact that the coupler has a left-hand thread and that the shaft has flats ground on it to engage a very thin open-end wrench. The only advice I can add to others' stories is that you can use a bench grinder to slim down a wrench which is too thick to fit into the gap between the coupler and the base housing. I already owned a set of so-called "ignition" wrenches, and all the sizes up to "1/4" were thin enough to fit into the gap. But the 9/32" wrench (which was what I needed) was just a a little bit too fat. Grinding down the head to fit into the gap was the most-time consuming part of the repair.
Other Parts Used:
-
David from Orange, CA
-
Difficulty Level:Easy
-
Total Repair Time:15 - 30 mins
-
Tools:Wrench set
68 of 71 people
found this instruction helpful.
Was this instruction helpful to you?
Thank you for voting!
Synthetic part of coupling separated from metal attaching plate
I have to disagree with several other feedbacks. The instructions included with the part direct the user to "pry" the old attachment plate off the drive shaft. Because the plate is made of aluminum and the shaft is steel, this took about 1 minute to accomplish with absolutely no damage to the shaft. It took about 30 seconds to install the new part. It took longer to clean up than it had to perform the repair and I didn't need to find and/or make any special tools.
Other Parts Used:
-
CARL from ARLINGTON, VA
-
Difficulty Level:Really Easy
-
Total Repair Time:Less than 15 mins
-
Tools:Screw drivers
43 of 43 people
found this instruction helpful.
Was this instruction helpful to you?
Thank you for voting!
Teeth on blender coupling had broken.
Old coupling was harder to get off than I anticipated from reading the other repair stories on your site, but those reviews gave me encouragement to keep trying. Using the screw driver under the coupling as instructed, I lifed up on the coupling but had a very hard time getting it to budge. After many tries it eventually came off, but the rubber and metal parts of the coupling had separated by that time. No damage done. I cleaned off the shavings before installing the new part, as instructed, and had no more problems at all. To test the repaired blender I then made a batch of margaritas. Success! My problems getting the old part off might have been partly because I' m 77 yrs. old, female (less strength to gein with) with arthritis in my hands, BUT I DID IT! Thanks!
Other Parts Used:
-
Pat from Houston, TX
-
Difficulty Level:A Bit Difficult
-
Total Repair Time:30 - 60 mins
-
Tools:Screw drivers
35 of 36 people
found this instruction helpful.
Was this instruction helpful to you?
Thank you for voting!
Coupling on blender base was bad.
The coupling simply screws on to the base. The only difficulty is holding the shaft still to break the coupling loose. You need a thin wrench which I didn't have so I had to grasp it with needle nose pliers. Remember the coupling has left hand threads.
Other Parts Used:
-
Barry from Madison, MS
-
Difficulty Level:Easy
-
Total Repair Time:Less than 15 mins
-
Tools:Pliers
28 of 32 people
found this instruction helpful.
Was this instruction helpful to you?
Thank you for voting!
Plastic drive coupler at the top of our Kitchen Aid Blender broke
Our blender is about two years old. My son was making a smoothie and must have not seated the glass carafe down correctly, because after he was done, all of the plastic teeth on the drive coupler (on top of the base) were sheared off and scattered on the countertop. I was about to throw the thing away and spend another $125 on a replacement blender. After an internet search, I found the replacement part at PartSelect for $8.00. I watched their online video on how to switch out the drive coupler and realized how easy it was. The part arrived three days after I ordered it. In a little more than 15 minutes of gentle prying with a screwdriver, I had removed the old coupler and hand tightened the new one on the drive spindle. I had my son christen the new coupler with a smoothie. Worked perfectly.
Other Parts Used:
-
Howard from Gaithersburg, MD
-
Difficulty Level:Easy
-
Total Repair Time:15 - 30 mins
-
Tools:Screw drivers
25 of 26 people
found this instruction helpful.
Was this instruction helpful to you?
Thank you for voting!
rubber part of the coupling broke
1)removed remains of the rubber
2)bent the metal so the pliers had room to hold the pin
3)hold the pin w/pliers
4)while holding pin unscrew the copling
5)screw new copling
6)done!
2)bent the metal so the pliers had room to hold the pin
3)hold the pin w/pliers
4)while holding pin unscrew the copling
5)screw new copling
6)done!
Other Parts Used:
-
george from new york, NY
-
Difficulty Level:Really Easy
-
Total Repair Time:Less than 15 mins
-
Tools:Pliers
25 of 31 people
found this instruction helpful.
Was this instruction helpful to you?
Thank you for voting!
- < Prev
- 1
- 2
- 3
- Next >
Questions and Answers
We're sorry, but our Q&A experts are temporarily unavailable.
Please check back later if you still haven't found the answer you need.
- < Prev
- 1
- 2
- 3
- Next >
Sort by:
Search filter:
Clear Filter
Your search term must have 3 or more characters.
Keep searches simple. Use keywords, e.g. "leaking", "pump", "broken" or "fit".
Sorry, we couldn't find any existing answers that matched.Try using some different or simpler keywords, or submit your new question by using the "Ask a Question" button above!
Yvonne
July 20, 2017
I bought a new drive rubber coupler but before installing it I noticed a really tacky substance left over from the old coupler stuck to my blender. Should I clean this off, and if so … how?! I tried using normal dish soap and no luck so far.

Hi Yvonne, I’m sorry to hear that. We recommend trying a mild-medium cleaner. Make sure to get the area nice and damp and then try scrapping it off. If this does not work you should try a sticky substance remover such as Goo Gone. I hope this helps!
28 people found this helpful.
Was this helpful?
Thank you for voting!
Adam
July 20, 2017
Looking down at my blender I see only a metal wheel, I know I have to remove it to replace my coupler but how do I get it off without making my blender worse. Does it just pop off?
Hello Adam, to remove your coupler, try to pull it up as you are turning the bottom to pop it off and remove the old part. Please let us know if you have any further questions.
11 people found this helpful.
Was this helpful?
Thank you for voting!
Nick
July 20, 2017
Replacing my black coupler and the video shoes that the part is a right turn part but mine turns both ways. Is my blender more broken than I thought or is mine just different than the example?
Hi Nick, do not worry the part is meant to turn both ways! Good luck with this repair!
9 people found this helpful.
Was this helpful?
Thank you for voting!
Joe
November 18, 2017
How do I replace the drive coupling on the blender
For model number ksb5bu4
Hi Joe, Thank you for the question. Here is a link to the video on installing the Coupling. Hope this helps!
https://www.youtube.com/watch?v=AwAkY4s70kE
6 people found this helpful.
Was this helpful?
Thank you for voting!
Shirley
February 5, 2018
While using blender on liquid setting a grounding occurred and chewed the coupling. I need a new one but the screw under the coupling isn't very tall to put coupling back on? Do i need another part?
For model number KSB5MC4
Hi Shirley,
Thank you for your question. If it is just your coupling that got damaged that should be the only part that you need to replace. To get the screw that your coupler goes on you would have to replace your entire motor. I hope that helps. Good luck with your repair.
6 people found this helpful.
Was this helpful?
Thank you for voting!
Louise
February 28, 2020
Please and kindly rsvp if your recommended replacement piece is comparable for my kitchen aid model before i place the order on line. Thank you so much!
For model number KSB5NK4
Hello, Thank you for your question. Drive Coupling - Manufacturer Part Number WP9704230 This part is in stock. You are welcome to order it from our site if you would like. We hope this helps.
3 people found this helpful.
Was this helpful?
Thank you for voting!
Claude
August 12, 2019
I have an old blender that needs a drive coupling. My model no is ksb3wh3. You do not show that model. The nearest thing is ksb5wh3. Will this coupling work on my ksb3wh3
For model number ksb5wh3
Hello Claude, thank you for inquiring. I was able to locate the information needed for your model and this Drive Coupling part number PS11746921 is the correct replacement for it. Good luck with your repair!
3 people found this helpful.
Was this helpful?
Thank you for voting!
Sarah
August 29, 2019
Is this the correct drive part for my KitchenAid blender?
For model number 4KSB5WH3
Hi Sarah,
Thank you for your question. Yes, this would be the correct drive coupler for your blender. I hope this helps. Thank you and have a great day!
3 people found this helpful.
Was this helpful?
Thank you for voting!
Albert
December 29, 2017
How do i get the old meatal coupling off ? Is it threaded clockwise or counter clockwise to unscrew ?
For model number KSB5ER4
Hi Albert,
Thank you for your question. There is a video listed with the part on our website that you may reference on how to install the coupler. I hope this helps. Thank you and have a great day!
3 people found this helpful.
Was this helpful?
Thank you for voting!
Kay
September 18, 2019
I need a new drive coupling for my KitchenAid blender. The full model number is ksb5wh. It has no number following. I don’t find this number listed on your site. Is it replaceable? Thanks
For model number KSB5WH
Hello Kay, thank you for writing. It is not shown as compatible to your model. Unfortunately the replacement for your model is discontinued. We have no replacement information for it. You will need to reach out to KitchenAid directly for a substitution part number. Please feel free to get back in touch with us if they provide you with one. Thank you!
2 people found this helpful.
Was this helpful?
Thank you for voting!
- < Prev
- 1
- 2
- 3
- Next >
Related Parts

$27.45
In Stock
Produce Preserver Filter
$27.45
PartSelect Number: PS3503014
Fresh Flow Produce Preserver is made for your refrigerator to help keep produce fresh for longer by absorbing the chemical, ethylene, that causes your fruits and vegetables to ripen quicker. Your produce could be fresh f... 
$42.42
In Stock
Solid Element Cleaner
$42.42
PartSelect Number: PS474316
This solid element restorer is for ranges and cooktops. Solid element restorer restores and protects solid elements from rusting and spotting. Follow the instructions on the label when using this product. 
$16.07
In Stock
Affresh Washing Machine Cleaner - 3 pack
$16.07
PartSelect Number: PS1960673
This front load washer cleaner removes odor-causing residue. Use it once a month and it will keep your machine fresh and clean. Package comes with 3 tablets. 
$14.32
In Stock

$38.09
In Stock
Oven Cleaning Gel
$38.09
PartSelect Number: PS12366520
This low-odor gel, easily cleans away tough burnt-on deposits at room temperature. Apply the gel evenly on the cooled oven surface. Leave the gel to set overnight then wipe away with a clean cloth. 
$22.95
In Stock
Cooktop Cleaning Cream
$22.95
PartSelect Number: PS12717774
Make your cooktop shine with Frigidaire ReadyClean Glass and Ceramic Cleaner. Our scratch-free, streak-free formula removes smudges, grease, burnt-on food, dirt and oil, while protecting and polishing to repel dust and d...
Model Cross Reference
This part works with the following models:
PartSelect Number: PS11746921
Manufacturer Part Number: WP9704230
Manufacturer Part Number: WP9704230
Brand
Model Number
Description