


Models
>
MMV5186ACQ
MMV5186ACQ ((ABSEMTC)) LG Range - Overview
Sections of the MMV5186ACQ
[Viewing 4 of 4] LG Range")
 LG Range")
 LG Range")
 LG Range")
Keep searches simple, eg. "belt" or "pump".

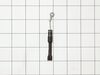
Air Duct Bracket
PartSelect #: PS3523851
Manufacturer #: 4810W1A151A
This bracket holds the metal or plastic flapper that closes off the exhaust duct when the fan is not running and opens when the fan turns on. If the exhaust fan on your microwave does not appear to be...
$27.00
In Stock


 – Part Number: 6851W1A002E")


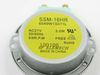
Magnetron
PartSelect #: PS3529034
Manufacturer #: 6324W1A001L
This part is used to generate microwave energy/heat.
$229.82
In Stock


Questions And Answers for MMV5186ACQ
We're sorry, but our Q&A experts are temporarily unavailable.
Please check back later if you still haven't found the answer you need.
Common Symptoms of the MMV5186ACQ
[Viewing 4 of 4]No heat
Fixed by
these parts
these parts


Show All
Tray won’t turn
Fixed by
these parts
these parts

Show All
Won’t turn on
Fixed by
these parts
these parts

Show All
Doesn’t shut off
Fixed by
these parts
these parts
Show All
Keep searches simple. Use keywords, e.g. "leaking", "pump", "broken" or "fit".
Magnitron failed
Over the stove microwave installed in top cabinet row.
1. Unplug device.
2. Two people to remove from wall/cabinet (remove two, large, top mounting screws and rotate entire microwave down and off the wall mount). Should be some wood spacers between top of device and bottom of cabinet.
3. Remove screws from sheet metal cover.
4. Remove one screw holding blowers in place and rotate out of the way, in order to gain access to 2 of 5 screws that hold the magnetron in place.
5. Unplug magnetron and remove the 5 screws.
6. Drop in new magnetron and re-assemble microwave in reverse order (steps 5-3).
7. Two people restore micro to wall/cabinet. Replace wood spacers, re-install two, large mounting screws (finger-tight). Test device. Secure the two large screws.
Parts Used:
-
Joseph from WILTON, NH
-
Difficulty Level:A Bit Difficult
-
Total Repair Time:1- 2 hours
-
Tools:Screw drivers
8 of 12 people
found this instruction helpful.
Was this instruction helpful to you?
Thank you for voting!
Would not heat and made a buzzing or popping sound
Unplug the microwave. Remove the Philips head and safety Torx head screws along the bottom of the sides and rear of the microwave which hold the black cover on. Lift the cover up at the rear and slide it backwards to disengage the tabs on the front top. Remove the cover. Discharge the capacitor by shorting the terminals to each other and then ground. Do this with a well insulated object and be aware there may be a pop when you do this. Keep hands, etc. on the insulated part of the object (screwdriver handle, etc). There's a lot of stored energy in that capacitor. I'd advise first checking the diode to make sure its not bad. Replace it if it is. The Magnatron is held in with a couple of screws on the top and sides. Unplug the connector and remove the screws. Remove the Magnatron. Installation is the reverse of removal.
Parts Used:
-
Thomas from NEWARK, DE
-
Difficulty Level:Easy
-
Total Repair Time:15 - 30 mins
-
Tools:Screw drivers
4 of 5 people
found this instruction helpful.
Was this instruction helpful to you?
Thank you for voting!
Turntable rolloers
picked up turntable plate (glass), removed broken part, placed new part
in position and replaced the glass plate.
less than one minute
in position and replaced the glass plate.
less than one minute
Parts Used:

-
Bruce from SUPERIOR, NE
-
Difficulty Level:Really Easy
-
Total Repair Time:30 - 60 mins
3 of 3 people
found this instruction helpful.
Was this instruction helpful to you?
Thank you for voting!