


Models
>
LSFD2591ST
LSFD2591ST LG Refrigerator - Overview
Models starting with LSFD2591ST
Click on the best match to narrow your results.
- LSFD2591ST LG Refrigerator (LG Refrigerator Model LSFD2591ST Parts)
- LSFD2591ST ( 02 ) LG Refrigerator (LG Refrigerator Model LSFD2591ST/02 Parts)
- LSFD2591ST ( 01 ) LG Refrigerator (LG Refrigerator Model LSFD2591ST/01 Parts)
- LSFD2591ST ( 00 ) LG Refrigerator (LG Refrigerator Model LSFD2591ST/00 Parts)
- LSFD2591ST ( ASTCNA0 ) LG Refrigerator (Lg Studio - Ultra-Large Capacity Counter-Depth 3 Door French)
- LSFD2591ST ( ASTCNA1 ) LG Refrigerator (Lg Studio - Ultra-Large Capacity Counter-Depth 3 Door French)
- LSFD2591ST ( ASTCNA3 ) LG Refrigerator (Lg Studio - Ultra-Large Capacity Counter-Depth 3 Door French)
- LSFD2591ST ( ASTCNA2 ) LG Refrigerator (Lg Studio - Ultra-Large Capacity Counter-Depth 3 Door French)
- LSFD2591ST ( ASTCNA4 ) LG Refrigerator (Lg Studio - Ultra-Large Capacity Counter-Depth 3 Door French)
Keep searches simple, eg. "belt" or "pump".


Refrigerator Water Filter
PartSelect #: PS12724833
Manufacturer #: AGF80300702
This refrigerator water filter replacement is for 2010 LG refrigerators that have either forward French doors or are the four-door dispensing models. This filter is designed to minimize impurities tha...
$102.03
In Stock

FILTER ASSEMBLY,AIR CLEANER
PartSelect #: PS16222687
Manufacturer #: ADQ73214408
Refrigerator Air Filters are a key component for neutralizing odors and ensuring a fresh stream of air into your refrigerator. Swapping your old filter out for a fresh one isn’t difficult and should t...
$67.74
In Stock

Water Inlet Valve Assembly
PartSelect #: PS3533117
Manufacturer #: AJU72992601
This includes the primary and secondary valves along with the wire harness.
$261.65
In Stock

Refrigerator Door Switch
PartSelect #: PS3529268
Manufacturer #: 6600JB1010A
This door switch is used in refrigerators. It is activated by the closing and opening of the door
$44.95
In Stock

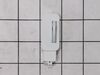
Handle Screw
PartSelect #: PS8752913
Manufacturer #: MJB63190001
This handle screw, also known as a mounting bolt, is a mounting screw to help secure the door handle to your refrigerator door. If your handle is loose, you may just need to tighten the screw. If your...
$11.88
In Stock


Common Symptoms of models starting with LSFD2591ST
[Viewing 10 of 10]Leaking
Fixed by
these parts
these parts


Show All
Light not working
Fixed by
these parts
these parts
Show All
Not dispensing water
Fixed by
these parts
these parts

Show All
Door won’t open or close
Fixed by
these parts
these parts


Show All
Ice maker not making ice
Fixed by
these parts
these parts

Show All
Ice maker won’t dispense ice
Fixed by
these parts
these parts

Show All
Door Sweating
Fixed by
these parts
these parts
Show All
Noisy
Fixed by
these parts
these parts

Show All
Frost buildup
Fixed by
these parts
these parts

Show All
Fridge and Freezer are too warm
Fixed by
these parts
these parts

Show All
Keep searches simple. Use keywords, e.g. "leaking", "pump", "broken" or "fit".
Remove and replace light switch
Video makes it look easy. Kenmore refrigerator does not have "groove" along the right hand side of switch that allows for pushing down on release. Used a thin screwdriver to get under to push while holding switch edge with pliers. Kept slipping. Tape sides to avoid scratching inside of refrigerator.
Parts Used:
-
Debbie from Waltham, MA
-
Difficulty Level:A Bit Difficult
-
Total Repair Time:30 - 60 mins
-
Tools:Pliers, Screw drivers
37 of 61 people
found this instruction helpful.
Was this instruction helpful to you?
Thank you for voting!
replace leaking water inlet valve assembly
1. Shut off water to refrigerator. 2. Removed bottom sheet metal cover (6 screws). 3. Removed leaking water inlet valve assembly from refrigerator (1 screw). 4. Remove water inlet tube (loosen nut) and tube back to refrigerator (pull from water valve after remove cotter pin washer). 5. Detach two electrical wire harnesses. 6. Install new water inlet valve assembly to refrigerator (1 screw). 7. Replace both water tubes to water inlet assembly. 8. Re-attach both wiring harnesses. 9. Turn water to refrigerator on. 10. Check for leaks. 11. Re-attach bottom sheet cover (6 screws).
Parts Used:
-
Richard from JACKSONVILLE, FL
-
Difficulty Level:Really Easy
-
Total Repair Time:15 - 30 mins
-
Tools:Screw drivers
30 of 50 people
found this instruction helpful.
Was this instruction helpful to you?
Thank you for voting!
Ice / water dispenser control panel cover discolored at bottom due to splashing water
I suggest turning off the water valve and power to the refrig before starting work. If this is not done the water dispenser will probably spray water down the front of the refrig. The whole icemaker assembly must be pulled out from the front. It is a friction fit--just insert fingers in the ice chute and pull out. The entire piece will pull out from the door. The control panel cover is held in by 8 screws that extend through the circuit board to the cover. It is a good idea to unplug the wiring to the circuit board when replacing the cover to prevent tension damage to the small guage wires. Once the new control panel cover is attached to the circuit board, the whole assembly can be reinstalled into the door.
Parts Used:

-
James from ST AUGUSTINE, FL
-
Difficulty Level:A Bit Difficult
-
Total Repair Time:30 - 60 mins
-
Tools:Screw drivers
14 of 17 people
found this instruction helpful.
Was this instruction helpful to you?
Thank you for voting!