


Models
>
JVM1330WW01
JVM1330WW01 General Electric Microwave - Overview
Sections of the JVM1330WW01
[Viewing 2 of 2]

Keep searches simple, eg. "belt" or "pump".

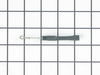
Light Bulb - 40W 130V
PartSelect #: PS247209
Manufacturer #: WB36X10003
This light bulb is a 40 watt, 130-volt clear appliance light bulb for your microwave. It is sold individually.
$27.97
Special Order

Light Socket - 250V 75W
PartSelect #: PS230544
Manufacturer #: WB08X10016
Light bulb not included.
$29.59
Special Order


Aluminum Grease Filter
PartSelect #: PS255242
Manufacturer #: WB6X486
This aluminum filter collects grease particles in the air from cooking. Sold individually.
$53.00
Special Order


Door Handle
PartSelect #: PS232260
Manufacturer #: WB15X335
This white handle does NOT come with the screws.
No Longer Available


Questions And Answers for JVM1330WW01
We're sorry, but our Q&A experts are temporarily unavailable.
Please check back later if you still haven't found the answer you need.
Common Symptoms of the JVM1330WW01
[Viewing 6 of 6]Won’t turn on
Fixed by
these parts
these parts


Show All
Doesn’t shut off
Fixed by
these parts
these parts
Show All
No heat
Fixed by
these parts
these parts
Show All
Door not closing properly
Fixed by
these parts
these parts

Show All
Touchpad does not respond
Fixed by
these parts
these parts
Show All
Door stuck closed
Fixed by
these parts
these parts
Show All
Keep searches simple. Use keywords, e.g. "leaking", "pump", "broken" or "fit".
Replace the door handle
Opened the microwave and locate the two screws that holds the door handle in place, unscrew the old handle then place the new handle make sure the orientation of the new handle is right.
Parts Used:
-
Pat from Noble, OK
-
Difficulty Level:Really Easy
-
Total Repair Time:Less than 15 mins
-
Tools:Screw drivers
466 of 476 people
found this instruction helpful.
Was this instruction helpful to you?
Thank you for voting!
the handle broke off the door of the microwave
Removed the broken handle and replaced it with absolutely no problem. We thank you so much for having the part as we were sure we would have to buy a replacement microwave. This microwave was put into custom cabinetry so it was so great to be able to just purchase the handle!!!!!!!!
Parts Used:
-
Janet from BEDMINSTER, NJ
-
Difficulty Level:Really Easy
-
Total Repair Time:Less than 15 mins
-
Tools:Screw drivers
367 of 370 people
found this instruction helpful.
Was this instruction helpful to you?
Thank you for voting!
light worked, timer and control pad worked, but no turntable, no heat, no noises of any sort, just didn't start up
Noted on partselect.com that someone else with this problem, found it to be secondary door switch. There are three door switches in this model, but online info noted that one of the three might feel "soft" (in my case, one switch clicked in a rather "jiggly" way, the other two were strong decisive clicks.) To access the door switches on this model was the only difficult part. First use a torx bit to remove the two torx screws below the latches inside the microwave. This frees the latching part inside, that holds the door switches, which you will remove after you take off the control panel. The top grill has to come off before you can remove the door panel. Remove the screws above the grill, on the microwave top cover, The grill on this model is covered with a panel that moves out when it vents. After removing the two top screws, the covered grill vent slides left to remove. Be careful, as the sliding tabs are plastic. Wiggle and jiggle it, to slip it off. Below the removed grill, is a small metal grill with one screw in lower center. Remove that screw, and wiggle that out. You'll then see the one screw that holds on the control panel. Remove this screw, and lift the control panel up to remove. Again, go slowly and gently, as the bottom tabs holding the control panel in, are also plastic and easily broken. Lay the control panel on something, (I used the coffee maker) and pull out the wire bundles tucked on the left, that are attached to the latching panel. Wiggle the latching panel gently to lift it up off of it's plastic tabs and pull it out towards you, so you can see the three door switches. Each switch (part number WB24X829) has a little black switch on it. Feel each switch with either your finger, or a screwdriver to see which one doesn't "click" strongly. The weak one is the one you will replace. The door switches are fitted into a tab, and plugged into their wires. Remove the defective switch, pull out the wires, and replace it with the new switch, plugging back the wires, and slipping it back into it's plastic tabs. Then put everything back together in reverse order. The entire job took me fifteen minutes EXCEPT for figuring out how to slide off the upper grill, which I have told you. A repairman would have cost $150, the part was $18. AND, there's a good chance, the other two switches will get "used up" in the next year or so as well, so I'll be ready next time. Thank you, Partselect, why work all day, to make money, only to give it to somebody else, for fifteen minutes of work. All I needed was the knowledge.
Parts Used:
-
Marla from Arlington, TX
-
Difficulty Level:Easy
-
Total Repair Time:Less than 15 mins
-
Tools:Screw drivers
312 of 372 people
found this instruction helpful.
Was this instruction helpful to you?
Thank you for voting!