


Models
>
D1471DBK
D1471DBK LG Dishwasher - Overview
Sections of the D1471DBK
[Viewing 1 of 1]
Keep searches simple, eg. "belt" or "pump".


Roller with Axle
PartSelect #: PS3523050
Manufacturer #: 4581DD3002A
Sold individually.
$19.30
In Stock


Dishwasher Water Inlet Valve
PartSelect #: PS8769826
Manufacturer #: 5221DD1001E
This part is the replacement inlet valve for your dishwasher. It is approximately 4-1/2 inches by 3-1/2 inches. The water inlet valve in your dishwasher connects to the water source and solenoid wire...
$126.21
In Stock


Questions And Answers for D1471DBK
We're sorry, but our Q&A experts are temporarily unavailable.
Please check back later if you still haven't found the answer you need.
Common Symptoms of the D1471DBK
[Viewing 8 of 8]Leaking
Fixed by
these parts
these parts


Show All
Door latch failure
Fixed by
these parts
these parts
Show All
Not cleaning dishes properly
Fixed by
these parts
these parts
Show All
Door won’t close
Fixed by
these parts
these parts
Show All
Will not dispense detergent
Fixed by
these parts
these parts

Show All
Not draining
Fixed by
these parts
these parts
Show All
Will not fill with water
Fixed by
these parts
these parts

Show All
Not drying dishes properly
Fixed by
these parts
these parts

Show All


Keep searches simple. Use keywords, e.g. "leaking", "pump", "broken" or "fit".
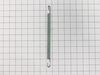
Broken door spring allows the door to overextend to the floor if not propped.
Simple, removed screws securing machine in the cabinet, then pull the unit out of the cabinet space about 10 inches. Springs are accessible within this extension. You need strong hands to extend the springs and attach them. Once attached, push machine back in place and re-install the anchor screws. In my situation, only one spring was broken, so the attached side revealed the correct slot to place the hook on the top position, the bottom position has a plastic lead for the spring, and that lead is attached to a rope to the door hinge. Note: Replace BOTH springs, even if only one is broken.
Parts Used:
-
Gregory L from INDEPENDENCE, OH
-
Difficulty Level:Easy
-
Total Repair Time:15 - 30 mins
-
Tools:Screw drivers
27 of 33 people
found this instruction helpful.
Was this instruction helpful to you?
Thank you for voting!
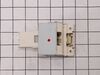
The door would not stay latched closed (due to moving the dishwasher)
Unscrew all screws on the inside of the dishwasher door. Carefully separate the front panel from the inside panel. Lift out the latch assembly, remove connectors from both sides using needle nose pliers. Reconnect to new assembly and situate back into place. Close front and inside panel, replace all screws, making sure the short and long screws go back to where they came from. Quick easy project to eliminate 2 trips from a repairman, 1 for the diagnosis and 1 to do the work!
Parts Used:
-
Kim from SEATTLE, WA
-
Difficulty Level:Very Easy
-
Total Repair Time:Less than 15 mins
-
Tools:Pliers, Screw drivers
4 of 5 people
found this instruction helpful.
Was this instruction helpful to you?
Thank you for voting!
Two Rollers missing on lower tray.
-
Thomas from BOYNTON BEACH, FL
-
Difficulty Level:Really Easy
-
Total Repair Time:Less than 15 mins
5 of 8 people
found this instruction helpful.
Was this instruction helpful to you?
Thank you for voting!