


Models
>
79077462800
79077462800 Kenmore Range - Overview
Sections of the 79077462800
[Viewing 5 of 5]
Manuals & Care Guides for 79077462800
Click to downloadInstall
Installation Instructions
(1MB)
Install
Installation Instructions
(2.05MB)
Manual
Owner's Manuals
(6.03MB)
Keep searches simple, eg. "belt" or "pump".

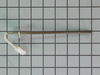
Temperature Sensor
PartSelect #: PS1528542
Manufacturer #: 316490000
This temperature sensor detects the temperature within the oven cavity.
$65.85
In Stock

Light Bulb
PartSelect #: PS12751166
Manufacturer #: 316538904
Clear, 120 Volt, 40 Watt.
$25.08
In Stock

LENS
PartSelect #: PS16218465
Manufacturer #: 5304524341
This lens covers the interior oven light bulb.
$15.66
In Stock

GLASS
PartSelect #: PS11728351
Manufacturer #: 5304503232
This is also called the heat barrier glass.
$194.33
In Stock

Natural Gas to Liquid Propane Conversion Kit
PartSelect #: PS2351422
Manufacturer #: GRLP3
This kit is used to convert your appliance to liquid propane. This liquid petroleum gas conversion kit contains seven orifices, each under an inch long.
$83.32
In Stock


Bake Igniter
PartSelect #: PS1528534
Manufacturer #: 316489400
This part ignites the gas to light the oven burner.
$217.97
In Stock


Oven Door Cap - White
PartSelect #: PS2368734
Manufacturer #: 316575500
This part goes over the top of the oven door glass. The door handle also attaches to the door cap.
$124.86
In Stock


LEVELING LEG ASSY
PartSelect #: PS12364627
Manufacturer #: 5304509869
Sold Individually. These legs should be adjusted to make your appliance level on uneven flooring.
$9.81
In Stock

White Touch up Paint
PartSelect #: PS467298
Manufacturer #: 5303321319
This 18 ml bottle of white appliance touch up paint is a little over two inches tall. It can be used for refrigerators, microwaves, ranges, clothes dryers, and freezers.
$17.68
On Order
Questions And Answers for 79077462800
We're sorry, but our Q&A experts are temporarily unavailable.
Please check back later if you still haven't found the answer you need.
Common Symptoms of the 79077462800
[Viewing 8 of 8]Little to no heat when baking
Fixed by
these parts
these parts

Show All
Oven is too hot
Fixed by
these parts
these parts
Show All
Oven not heating evenly
Fixed by
these parts
these parts
Show All
Gas igniter glows, but will not light
Fixed by
these parts
these parts


Show All
Will Not Start
Fixed by
these parts
these parts
Show All
Element will not heat
Fixed by
these parts
these parts
Show All
Door won’t close
Fixed by
these parts
these parts


Show All
Door won’t open after self cleaning cycle
Fixed by
these parts
these parts

Show All


Keep searches simple. Use keywords, e.g. "leaking", "pump", "broken" or "fit".
Oven wouldn't heat - broiler and burners worked fine-Bake Burner Igniter didn't work
It was the week before Thanksgiving and we didn't know what to do without an oven. I did some research on Google and of all the websites out there, I found a decent price here at Parts Select and ordered it on Friday. I was shocked when FEDEX pulled up to the door on Saturday afternoon. I went online to youtube and found a step by step video specifically for this part. It's posted by the Repair Clinic. http://www.youtube.com/watch?v=cLxKoF16gac. I was able to fix the part and probably saved at least $150.00 for a service call and repair time. The part cost about $90 and I was done in less than 15 minutes. We just got this stove about 2 years ago and I'm thinking maybe we could have saved my old stove since it had the same problem. Great job Parts Select - I got just what I needed and saved a ton of money in the process. Thanks also for their great informative video online. We had a great Thanksgiving and were very thankful for all our hot food fresh from the oven.
Parts Used:
-
Debbie from Rockford, MI
-
Difficulty Level:Easy
-
Total Repair Time:15 - 30 mins
-
Tools:Nutdriver, Screw drivers
187 of 226 people
found this instruction helpful.
Was this instruction helpful to you?
Thank you for voting!
Bought a new gas oven that did not come with a propane conversion kit.
I followed the simple instructions that were included in the kit. I started by replacing the 5 orifices on the top burners. The orifices are well labeled with numbers and colors. Next, I tightened the broiler burner orifice and the oven burner orifice with a 1/2 inch wrench. I had to tighten them pretty good to get the flame down where it is supposed to be. Then, I checked for leaks and I was then ready to cook.
Parts Used:
-
Denny from Bishop, CA
-
Difficulty Level:Easy
-
Total Repair Time:30 - 60 mins
-
Tools:Nutdriver, Wrench set
123 of 177 people
found this instruction helpful.
Was this instruction helpful to you?
Thank you for voting!
Stove was set up for natural gas and needed to be converted to LP
The LP conversion kit contained very good, detailed instructions. I replaced the gas orifices, took off the bottom door and adjusted the regulator.
Used the screwdriver to adjust the low flame and everything was done.
Used the screwdriver to adjust the low flame and everything was done.
Parts Used:
-
Ed from Orange, TX
-
Difficulty Level:Easy
-
Total Repair Time:30 - 60 mins
-
Tools:Nutdriver, Screw drivers
117 of 191 people
found this instruction helpful.
Was this instruction helpful to you?
Thank you for voting!