


Models
>
33-1467-00-01
33-1467-00-01 Tappan Range - Overview
Sections of the 33-1467-00-01
[Viewing 5 of 5]


Keep searches simple, eg. "belt" or "pump".

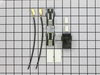
Terminal Block Kit
PartSelect #: PS470125
Manufacturer #: 5303935058
This surface burner terminal block kit comes with interchangeable mounting brackets, terminal box, ceramic wire nuts, heat shrink protective tubing and wires.
$20.60
In Stock

Drip Bowl - 8"
PartSelect #: PS437595
Manufacturer #: 316048413
This drip bowl is located beneath the element and catches any spills. It is sold individually and has a diameter of approximately 10 inches.
$15.99
In Stock

Chrome Drip Bowl - 6"
PartSelect #: PS437596
Manufacturer #: 316048414
This drip bowl is sold individually. This part is located beneath the element and catches spills from cooking.
$9.48
In Stock

Bake Element - 240V
PartSelect #: PS453960
Manufacturer #: 5303051519
This heating element is a partially open-style bake element. Carrying 240V and 2000W, it is 19-1/4" wide by 15" long. The two 90-degree push-on male spade terminals are 13-3/4" apart.
$48.61
In Stock

Light Bulb
PartSelect #: PS12751166
Manufacturer #: 316538904
Clear, 120 Volt, 40 Watt.
$25.08
In Stock

Main Terminal Block Kit
PartSelect #: PS471605
Manufacturer #: 5304409888
Terminal blocks (also called terminal boards or strips) provide a convenient means of connecting individual electrical wires.
$11.93
In Stock

6-Inch Coil Burner Element
PartSelect #: PS2368974
Manufacturer #: 318372211
This element has looped terminal ends and comes with a black medallion center. This element is a genuine OEM replacement part, has looped terminal ends, comes with a black medallion center, and fits m...
$49.98
In Stock

LENS
PartSelect #: PS16218465
Manufacturer #: 5304524341
This lens covers the interior oven light bulb.
$15.66
In Stock


Burner Switch Kit
PartSelect #: PS470145
Manufacturer #: 5303935086
This switch controls the stove top surface burner.
$51.03
In Stock


Surface Burner Coil Element - 8" - 2100W
PartSelect #: PS473948
Manufacturer #: 5308011964
$213.35
In Stock
Questions And Answers for 33-1467-00-01
We're sorry, but our Q&A experts are temporarily unavailable.
Please check back later if you still haven't found the answer you need.
Common Symptoms of the 33-1467-00-01
[Viewing 6 of 6]Element will not heat
Fixed by
these parts
these parts


Show All
Little to no heat when baking
Fixed by
these parts
these parts

Show All
Will Not Start
Fixed by
these parts
these parts
Show All
Oven not heating evenly
Fixed by
these parts
these parts
Show All
Oven is too hot
Fixed by
these parts
these parts
Show All
Little to no heat when broiling
Fixed by
these parts
these parts
Show All


Keep searches simple. Use keywords, e.g. "leaking", "pump", "broken" or "fit".
Baking Heating Element Burned Up
Used a screw driver with a socket head to remove the two hex head screws holding the old element. Pulled the old element forward until the two wire attachements were visable. The wires were attached with a simple tab connector. Removed the wires from the element. Attached wires to new element slide the element and wires back into wall of oven and replaced screws. Done!
Parts Used:
-
Christopher from North Salt Lake, UT
-
Difficulty Level:Really Easy
-
Total Repair Time:Less than 15 mins
-
Tools:Socket set
192 of 201 people
found this instruction helpful.
Was this instruction helpful to you?
Thank you for voting!
Cord was not tightened enough by delivery crew.
PF alarm appeared on display. Noticed clicking when cord was moved. Had arced for some time and melted original block. New part slightly different. Only has 3 lugs, old one had six. Stack using washers provided. Take note of colors before disassembly. Use caution while working through access opening. The edges are sharp. Only tools needed are phillips screwdriver, deep socket for lug nuts. Nut driver optional. Hope this is helpful.
Parts Used:
-
Timothy from Spring Valley, AL
-
Difficulty Level:Really Easy
-
Total Repair Time:15 - 30 mins
-
Tools:Screw drivers, Socket set
98 of 155 people
found this instruction helpful.
Was this instruction helpful to you?
Thank you for voting!
blown bake element
Removed the two screws that hold the element in place at the rear of the oven.Unplug each prob,you may need pliers as they can be a little tight.Reconnected the new element.Keep the old screws.New element does not come with screws.Always unplug range when doing repairs.
Parts Used:
-
joseph from washington, PA
-
Difficulty Level:Really Easy
-
Total Repair Time:Less than 15 mins
-
Tools:Nutdriver, Pliers
59 of 62 people
found this instruction helpful.
Was this instruction helpful to you?
Thank you for voting!